Use our layouts to products to prepare your projects. Layouts to products are available on the card of each product.
In order to start work with us, we need a project of your product! Here are visualisation models (.pdf and .cdr packages).
Colors:
Please take note that it needs to be done in vector graphics. Color used in the Project should be from PANTONE MATCHING SYSTEM® for coated paper.
Printing from CMYK or RGB palette may be slightly different from expected (one or two tones difference). Text should also be changed to curves. For bit maps, 300 dpi is enough to prepare something clearly visible
without pixelisation.
How to put graphics on a layouts to products ?
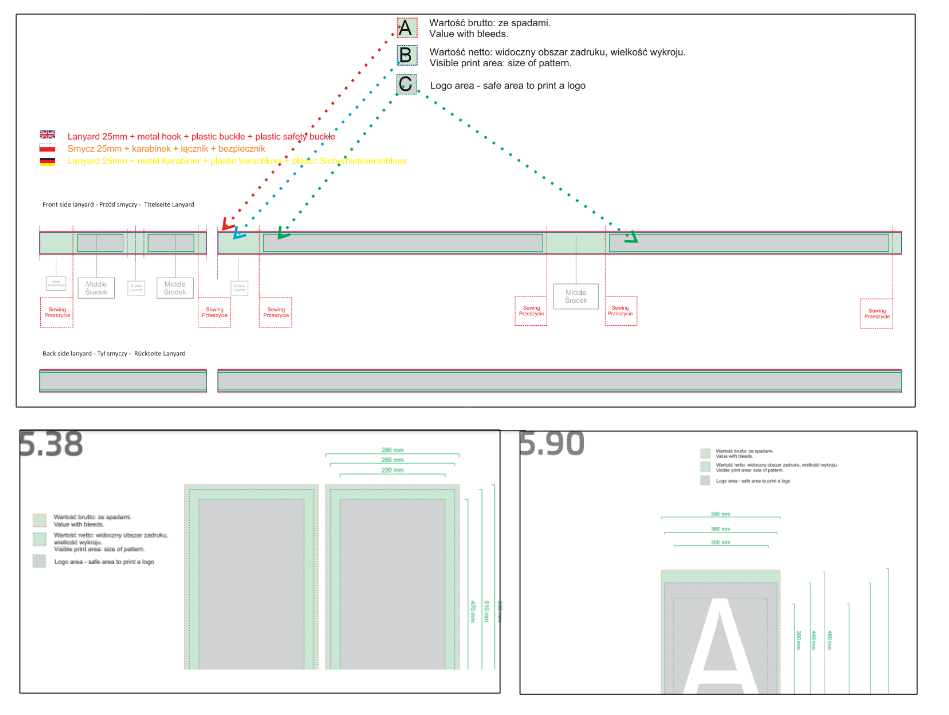
Our models have 3 zones!
A- Valua with blades (Red lline)
[this is the size of the product increased by printing trimmers]
B - Visible print area (Blue line)
[this is the size of the finished product, this area will be visible but there may be a shift with respect to surface A]
C - Logo Area (Green Line- with gray filling)
[safe area for placing important design elements, such as logos, texts, etc., we guarantee that this area will be visible and not cut off]
!REMEMBER
(!1) - Remember not to put important graphics (logos, text) outside the blue frame [Visible print area], The area is reduced by invisible places, assemblies, sewing, accessories, etc.
(!2) - If the product has a background in a color or pattern, remember to cover the entire area of the red frame! But keep in mind that the product size is blue frame
(!3) - In the case of a lanyard, remember that the inside of the lanyard is printed continuously (randomly) and there will be a cut on the tape in various random places also on the text logo etc. ! [Unless you select a matching print lanyards]